Welcome to this week’s TA Tabletop! But first, an anecdote:
In 1994, the band Blur wrote the very catchy song, “Girls & Boys.” According to Wikipedia, the front-man of Radiohead, Thom Yorke, once said he had wished he had written the song, and called Blur “bastards” for writing it first.
In 2014, Evil Hat Productions gave me the amazing opportunity to write a Fate World for them. I am very pleased with how “Masters of Umdaar” came out, but that doesn’t mean I don’t hold an overwhelming sense of awe and fist-shaking frustration towards fellow author Chris Longhurst. Mr. Longhurst, who I’ve never had the pleasure of meeting, is guilty of writing “Gods and Monsters,” a setting so brilliant and original that I kick myself for not coming up with it. Worse still, I must acknowledge the fact that any attempt of mine to create a creation-god setting would have been far inferior than his… curse the scallywag!
Thus, in a vain attempt to cash in on some of his genius, this week I’m proposing rules for merging “Gods & Monsters” and “Masters of Umdaar” together.
Speaking of other people’s ideas, the idea of mashing-up “Gods and Monsters” and “Masters of Umdaar” was proposed by someone else on G+ several months ago. Sadly, I did not record the person’s name… if he or she remembers, please let me know, and I’ll be glad to give credit where it is due.
GODS AND MASTERS
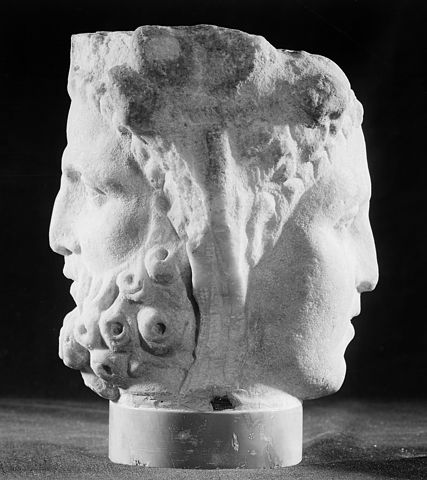
Image avaible through Creative Commons 4.0, courtesy of Wellcome Trust http://www.wellcome.ac.uk/
“Gods and Masters” is a two-part campaign set on the planet Umdaar. The gods in question are the Demiurge, the deities / demons / super-advanced aliens that made the planet as diverse and bizarre place it is today.
Gods & Monsters– Recommending Changes
In Thy Own Image – While some of the bioforms of Umdaar were created by accident or out of scientific curiosity, many were created or molded into the image of a certain god. Thus, I recommend looking (or rolling) on the Umdaar Bioform chart for inspiration. A centaur god of the wilderness makes sense, and the mind boggles at what a cyborg god would be like!
Regions – When creating regions, use the areas and rules listed in Gods & Monsters, but do not be afraid to add a sci-fi twist (for Umdaar-themed biomes, see this post from a few months back). Pick a distinct otherworldly name for each region, like the Crystal Forests or the Phantom Mountains. These regions will show up in both parts of the campaign, so make ‘em good!
Communities – Don’t forget that the communities on Umdaar don’t have to be human; likewise, any humans you encounter might not stay human for long! For the Demiurge, altering genetics is child’s play; you can raise dumb animals into sentience and shape worshipers into your image. If your power starts to bleed or a station is too close to a village, it might accidentally warp the mortal creatures nearby into strange new bioforms.
Artifacts – The Demiurge love their artifacts; its practically a compulsion. When they are working, they create tools to aid them. When they are courting, they give baubles and toys. Even if you’re not a god of Smithing or Tech, your Demiurge will have the ability to make artifacts that are metal, crystal, or even biomechanical in nature. Similarly, we recommend making artifacts part of the god’s identity, like Thor’s hammer or Hades’s Cap of Invisibility. This item might show up in a stunt. Alternatively, you can tie it into the God’s Boons, as follows:
Tier 1 – Innate – Your god may use this ability without an artifact.
Tier 2 – Requires the god to have their minor artifact (ex. a cloak, a piece of jewelry) at hand*
Tier 3 – Requires the god to have their signature artifact at hand*
The only exception to the “at-hand” rule is that a god can still use a boon if their artifact is in the care of a loyal community that worships them; this allows the god to use the boon “hands free,” but also opens your artifact up to theft or desecration.
If your artifact is lost, destroyed, or desecrated, your Demiurge will have to go on an epic journey to retrieve it, or to find the rare materials needed to rebuild it.
Sci-Fantasy: If you see the Demiurge as aliens, artifacts are easy to picture. However, for fantasy players, think of the artifacts as the god’s mantra-turned-object. Like Voldemort’s horcruxes or Sauron’s ring, they bear a part of the god’s soul.)
The Fall – When players start their campaign, it is in the early part of the Demiurge’s rule- there might not be races on Umdaar, or even a planet at all. However, at some point, eons in their future, the Demiurge will be gone. Did this take them by surprise, or do they have only have a limited window to be in our plane of existence? Do they learn of a prophecy, detailing how each will fall, like the Norse gods knew of Ragnarok? (Normally, I find “prophecies” lead for boring stories, but I make the exception with gods!)
Masters of Umdaar – Recommended Changes
Use the G&M approaches instead of the Fate: Bold, Subtle, Clever, Mighty, Wise, Swift.
PUTTING THEM TOGETHER
I see two easy ways to put the two games together:
NOW & LATER – The simplest way is to move from G&M to MoU is to play a short Gods & Monster campaign, end it, and then start a Masters of Umdaar campaign. If so, the G&M campaign is really about setting the stage; fill the world with wonders, bioforms, and artifacts. Demiurge should be encouraged to bleed power and leave loose threads- a small monster that the Demiurge let go because it is no threat to them might be a scourge that the archaeonauts have to deal with thousands of years later.
In this format, any godly Stations will likely become prominent regions in Umdaar. Of course, it’s possible that some of them will be inverted or corrupted: the Sky City becomes the Sky Ruins, the Shimmering Sea could become the Sludge Sea, or the forest god’s Screaming Forest can become the bustling industrial city known as the Screaming Furnace. The archaeonauts might even encounter a fallen god that has devolved into a monster (or even into a mad Master!)
FLASH BACK / FAST FORWARD – The second way to run a “Gods and Masters” game is to run both campaigns simultaneously; the group might play a G&M game one night, and a MoU game the next. This can lead to some messy bookkeeping, but it means that the actions of a G&M game might set up the problem for the next game; likewise, the archaeonauts might uncover a glorious artifact, only to flashback to its origins. This can be done with two sets of character sheets, but it is not necessary; we recommend the Reincarnation set-up detailing below:
Reincarnation– A seasoned group of archaeonauts, who have been together for years, encounter a half-mad sage. The sage tells the baffled archaeonauts that they are the demiurge reborn*, reincarnations of the godly warriors and creators. The party members laugh it off… but as they keep hearing more myths of the old gods, and stumble upon the relics of their “former incarnations,” they start to wonder if it’s true…
*It’s possible that you’re a reborn god, even if you’re playing a robotic archaeonaut that was never technically “born.” After all, as the Umdaar proverb says, “Even Ozell [the Bronze Goddess] was once a toy.”
Reincarnation Set-up – Players will create one character sheet for both Demiurge god and mortal archaeonaut. The approaches will be identical. The player should aim to create aspects that overlap as much as possible, but some aspects will be split in half, like the high concept (ex. Barbaraic God of the Beasts / Mortal Beastman Barbarian) or be intentionally inverted for different back-stories (ex. Crown Prince of the Gods / Orphaned Street Rat).
The only major difference will be the stunts and boons. A god will have one set of godly stunts, and access to boons. The archaeonaut will have a different set of stunts to represent their more modest abilities (and will likely be more action/adventure oriented). Of course, there might be potential for overlap; at the end of a long adventure, an archaenaut might recover an artifact of their former incarnation (granting them the stunt / boon in BOTH incarnations!)
Intention & Approaches: Whenever a god’s power fluctuates or an archaeonaut hits milestones, any Approach changes in one incarnation will be also changed for the other incarnation; this can represent an avatar embracing their older incarnation, a mere mortal being inspired by the tales of a god, or pure coincidence. However, the invokes and actions of an archaeonaut will not alter the intention tracker (at least, not at first… who knows what will happen when they start to embrace their destiny!)
Refresh: As the refresh of the character changes at milestones, it changes for both incarnations.
Stunt Changes: If a character gains a stunt at a milestone or buys a stunt with refresh, both characters gain a different stunt which only that specific incarnation can use (or, in rare cases, a stunt that they both can use).
Have any suggestions of mash-ups of your own? Let me know! Until next time, readers, game on!